Mastering Mold Manufacturing with the latest NX CAM’s features [VIDEO]

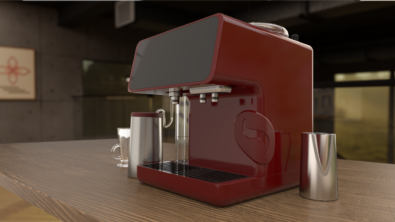
Beginning your day with a comforting cup of coffee from a coffee machine is a delightful experience. But as you take that first sip and gaze at the machine, have you ever wondered how these machines are made? Molding and tooling play key roles in their production, and a comprehensive CAD/CAM solution, such as NX software, for designing and manufacturing molds and dies, can facilitate their production.
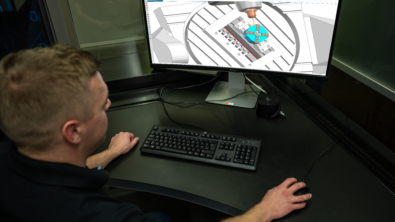
By introducing the new and existing functionalities in NX CAM we will see what it takes to machining a coffee vending machine cover and explore the mold manufacturing capabilities in NX that will help moldmakers like you to deliver the most challenging molds on spec and on time to stay competitive.
To begin, we’ll take the mold design created by the mold designers into NX CAM. It’s simple. Next, you’ll be introduced to the new Cloud Connect Tool Manager, which assists in selecting the appropriate cutting tools for your project. We’ll also delve into the innovative high-speed operation known as 3D Adaptive Roughing. Following that, we’ll explore the concept of reusing geometry across different operations. In addition, we’ll discuss how to apply finishing patterns in the Guided Curve operation. Furthermore, we’ll look at Post Hub, a cloud-based solution for postprocessing, where the digital twin of your CNC machine can be selected. Finally, we’ll emphasize the importance of simulating the machining process, which enhances safety and sustainability in production.
Bringing the Mold into CAM
The initial step involves importing the coffee machine mold into the CAM environment. With integrated CAD/CAM, a shared environment eliminates the need for data transfers or the loading of third-party data, ensuring that all design information seamlessly transitions into the manufacturing process, ultimately enhancing workflow efficiency. By utilizing Synchronous Modeling in NX, which simplifies part models for NC programming, we can eliminate intricate details not required for the milling operations, as explained below.

Cloud Connect Tool Manager
Making the right choice of cutting tools is the key for achieving precision, customization, and the desired final appearance in molded products. With the latest Cloud Connect Tool Manager, selecting the right tool is effortless. You have access to a vast library of milling tools through a user-friendly interface, simplifying the tool selection process.

You can also search and import cutting tools from vendor catalogs. In the absence of a specific tool in the library, you can create one from scratch by inputting details like the tool’s name, description, and number, and adjusting cutter and shank specifications directly on the screen.
In the case of the coffee machine mold we consider a pre- configured 80-millimeter face mill tool from the library.
3D Adaptive Roughing
After selecting the right cutting tools, we’ll employ 3D Adaptive Roughing to create an efficient toolpath, rapidly removing most of the material. In the latest version with new capabilities helps with faster toolpath generation, while preventing holder collisions, and automatically detecting and machining flat surfaces. Ultimately, 3D Adaptive Roughing can reduce machining time by 60%, generating high-speed machining toolpaths.

Re-using Geometry between machining operations
Once roughing is complete, a rest milling operation is set up for the mold core to eliminate any remaining material left after the adaptive roughing process. Using the ball nose milling cutter from the Frasia tools catalog that is imported in the Cloud Connect Manager tool, you can machine the features on top of the mold core. Before proceeding, it’s important to select the cutting area for the top of the mold core.

With the most recent NX CAM version, operation creation is simplified by reusing previously selected geometry from a selected operation, enabling you to generate a mill area using those cut areas through a simple right-click.
Finishing operation
Concluding the machining process involves implementing a finishing operation to achieve the desired mold accuracy and surface quality. Utilizing Fixed Axis Guiding Curves, an advanced finish milling technique guides the toolpath along the natural shape of the machined part, accommodating undercuts. The key step is selecting the Morph cutting pattern, guaranteeing the production of a high-quality mold, while eliminating the need for manual adjustments and reducing lead time.

Post processing and simulation
The final step is to simulate the machining process and then generate the program to drive the CNC machines on the shop floor. With Post Hub, an extensive cloud-based library of Machine kits, post processors, training material, and CAM add-ons with more than 1200 post processors and 100 unique Smart Machine Kit Solutions (SMKS) to choose from. In this case, we will choose the machine kit with the controller DMU 100P4 dV GTBC S840D and download it directly into NX.

In the latest version of NX, positioning the part on the machine has been simplified, providing a greater degree of control over how the part is placed, which is crucial for accurately replicating real-world manufacturing scenarios, allowing for precise validation, optimization, and safety assessment within the virtual environment.

Before sending CNC programs to the shop floor, we simulate the machining process using G-code-driven simulation in NX CAM. This digital twin technology helps to accurately display the motion based on the CNC programs and prevents production errors, ensures safety, speeds up setup, optimizes machine use, and reduces energy consumption.

Flexibility means lower cost…
With Value-Based Licensing, an extension of our existing NX software packages, you can access cost-effective, scalable access to industry-leading manufacturing tools. For those already using Value-Based Licensing, your CAM programmers can tap into your existing token pool to unlock advanced CAD/CAM features for tooling.
Explore our enhanced NX capabilities in mold manufacturing, empowering you deliver the most challenging molds on spec and on time to stay competitive.
Learn more -> here


![Siemens leads collaboration for advanced EV component manufacturing [article]](https://blogs.stage.sw.siemens.com/wp-content/uploads/sites/15/2024/03/erod-_SME-395x222.png)