How end-of-line testing can automate product fault detection

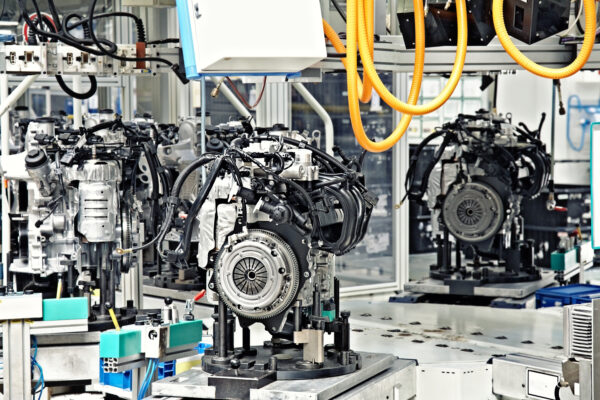
In the automotive sector, end-of-line testing uses vibroacoustic measurements to automatically and objectively detect faulty parts in the production line. Learn how automated measurements can help you minimize quality issues. And understand also how to optimize this process.
Table of Contents
Every product undergoes some form of testing at the end of the manufacturing process, but some tests are better than others. Do you have the capability and functionality to carry out the most extensive EOL testing without blowing your budget?
A century-old technique
In fact, vibroacoustic measurement has been a trusted end-of-line testing method to detect faults and defects in manufacturing since antiquity. Indeed, when a ceramist just finishes producing a series of fine pottery vases, how can he detect potential invisible flaws in the structure of the delicately crafted objects? He might gently tap every single vase. And he listens carefully to the acoustic response. Does the structure sound healthy and whole? Or does it produce a dull tone, hinting at the presence of small air bubbles or tiny cracks under the flawless surface?
Indeed, from the ancient ages, over the industrial revolution, to the modern digital age, noise and vibrations measurements have helped reveal many defects. In modern times, vibroacoustic measurements using calibrated sensors have become an automated, objective method to test high volumes of mass-produced parts. But, how do you apply and implement automated testing the right way?

Why end-of-line testing is important
Just like for our handcrafted vase, it is possible to assess the quality of many parts and manufactured products using noise and vibration testing. Yet, many companies are still not aware of this opportunity. Some consider the vibration behavior of a product as a secondary characteristic. They focus their attention on other, more tangible, product attributes such as its design, its surface quality or its color. But what lies beneath the shiny surface of the item is just as important as its appearance.
Indeed, it is only during operation that a product will reveal its true quality. Does it function flawlessly according to expectations or does it vibrate abnormally? Excessive noise and vibrations are often a sign of a production defect that went unnoticed so far. From the imperfections in the finish of a gear tooth to the imbalances of a bearing part, you can hear and feel the defects, even without seeing them.
How can you use noise and vibration testing to your advantage and unveil defaults in the parts, early in the manufacturing process?
Automated vibroacoustic measurements offer a fool-proof method to rapidly test every single part that comes off the production line for its quality.

What should you test?
In fact, every moving part and piece of a mechanical machine can, and should, be tested for its vibro-acoustic behavior. This includes:
- Parts of and whole internal combustion engines, of all sizes and for all applications
- Parts of and whole electric motors, of all sizes and for all applications, from the powerful traction motors down to the tiny windscreen wiper motor or the seat adjustment motor
- The extremely fast turning parts of turbochargers
- All types of compressors for air-conditioning units or for refrigerators
The applications of systematic end-of-line testing are not limited to parts produced for the automotive industry. Other industries can also benefit from the trusted method.
Even single components and non-moving parts are suitable test subjects. The method called acoustic resonance testing consists in exciting the part, for example, by hitting it with a small impact device and listening to its acoustic and vibration response. This method helps identify imperfections like cracks, cavities, improper heat treatment, wrong or missing material, and many more.
How to implement vibroacoustic end-of-line testing
So, now you understand why you should implement end-of-line testing. But how should you do it?
As with many other defect detection methods, it is best to rely on the knowledge and experience of a trusted partner. If you want to meet the demands of industrial quality testing, you should ask him questions such as:
- Which sensors should I use and where should I position them?
- How can I catch the signal of interest using highly sophisticated trigger mechanisms?
- Which analysis functions and evaluation algorithms should I apply?
- How can I build a test bench?
- How should I design the test cycle?

Introducing Simcenter Anovis
The questions above are the ones that Siemens experts can help you with when you implement the Simcenter Anovis solution. Simcenter Anovis is a robust and reliable industrial quality testing system. It is easy to integrate into end-of-line test benches and production lines. It helps to deliver product quality at lower production costs while preventing production line outages and reliably identifying defects.
Beyond simple fault detection, Simcenter Anovis also provides deeper, valuable insights into the product’s characteristics. These insights foster product enhancements or innovations. Indeed, they clearly point at the possible root cause of the identified problem. This information is not only valuable for the manufacturing team, which consequently implements improvements along the production line. It is also useful for the research and development teams, as a reliable, real-life input into future product enhancements.
Simcenter Anovis is a complete system, not a DIY tool kit. Implementing Anovis includes:
- free technical consulting, explaining the benefits and defining the limits of vibroacoustic defect detection
- adapting the modular hardware and software according to your tasks and process needs
- realizing feasibility studies to ensure the applicability of new tasks
- commissioning at the test bench builder and/or in the production environment, including the initial parameterization of the system’s communication and signal analysis
- operator training and customer services, tailored to the requirements of industrial production standards
How does Simcenter Anovis work?
Firstly, the Simcenter Anovis system collects data from a wide range of sensors over a large bandwidth. This data includes vibration from accelerometers or laser vibrometers, sound from microphones, rotational speed from high-precision tachometers, temperature, and torque. Of course, all of it is accurately recorded with the Anovis hardware.
Then, the dedicated Simcenter Anovis software for test bench control initiates a smart signal analysis on the data. It performs precise pass/fail checks for each object under test. With the software, users can also analyze the recorded signals, employing smart analysis methods in the frequency, order, angle, and time domains. As a result, they can reliably detect relevant fault patterns.
The system also applies statistical assessment procedures to dynamically tune the testing thresholds. These procedures turn Anovis into a self-learning system that gradually reduces the required setup effort and operation expertise. The responsible team can thus easily deliver a formal quality report that confirms that the part meets the required specifications and operates safely.
Do you want to learn more about this topic? Read the white paper or join our free on-demand webinar “End-of-line testing for automotive: How to perform NVH-based quality inspection”.
You will learn how to effectively:
- build a robust and reliable end-of-line testing
- integrate an efficient end-of-line quality system
- determine product faults by analyzing the acoustic signature
For more information?
For more info about the Simcenter Anovis functionalities, please read the article: Simcenter Anovis for end-of-line quality testing. Or, check out the technical on-demand webinar series.


