Getting Over Obstacles to Solid Edge Fast Search
For those who have installed Solid Edge ST9, you know by now that it now supports index-based search queries – a new option called Fast Search. While Fast Search is straightforward to configure, there can be obstacles (who would have thought?!) you may run into.
So let me point out the ones we are aware of, so you do not have to trip over them. ![]()
Let us start with a fundamental pre-requisite for Solid Edge Fast Search: the Windows Search Service. Here is how Microsoft introduces it: “Windows Search is a standard component of Windows 7 … and is enabled by default. …”
What if it is not enabled? Here is obstacle #1.
While our experience shows that everyone’s PC has the Windows Search Service indeed started by default, occasionally we ran into a situation where a customer’s file server running Windows 2008 R2 didn’t have this service running. We do not recommend to have the startup type set to “Automatic (Delayed Start)”, as this can delay the indexing process unnecessarily.
Open the ‘Services’ application (click on the Windows Start button and type “services” into the search box) and make sure it is started automatically and run by the ‘Local System’ account.
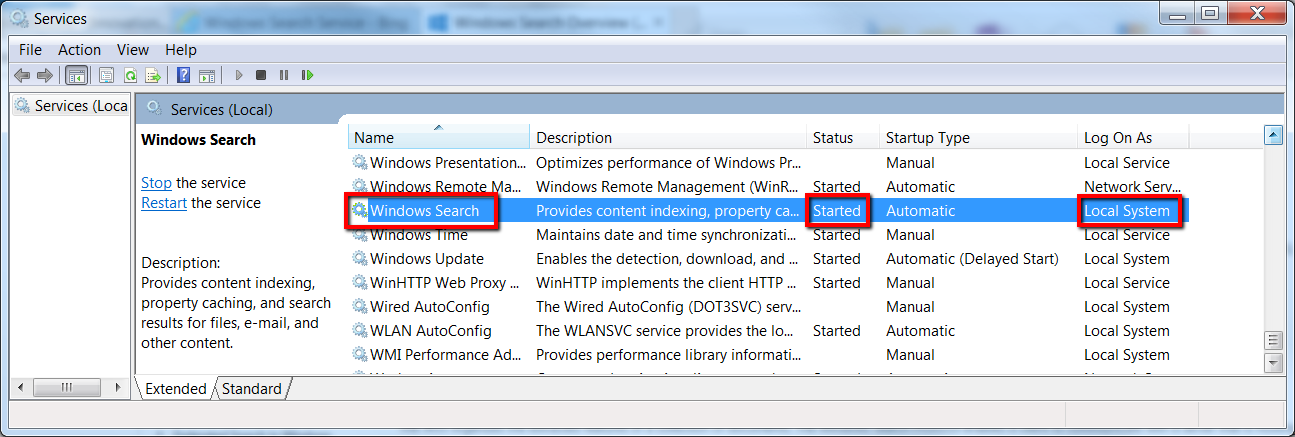 Windows’ Services application
The question: ‘How does the Windows Indexer know about our Solid Edge properties?’ characterizes another vital pre-requisite for Solid Edge Fast Search. The short answer: through the installation of Solid Edge ST9.
Windows Explorer provides the easiest way to quickly validate this. Using the ‘Details’ view type go to any folder, right-mouse-button click on any column (i.e. ‘Name) and click the ‘More …’ button at the bottom of the menu.
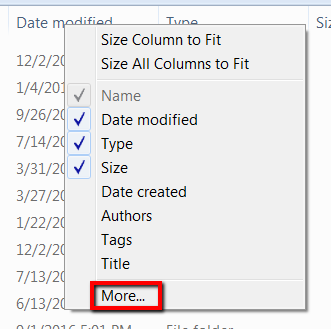 Windows Explorer column RMB menu
This brings up a dialog with a long list of properties Windows knows about. Now hit the keys ‘S’ and ‘E’ on your keyboard and the selection in the list jumps to “SE Links”.
What if it doesn’t? That would make obstacle #2. (Example on the right)
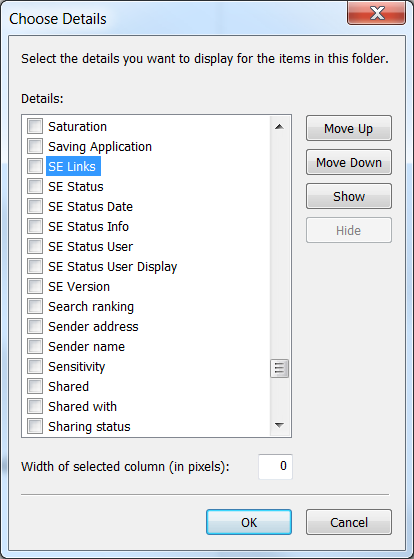 SE columns are listed
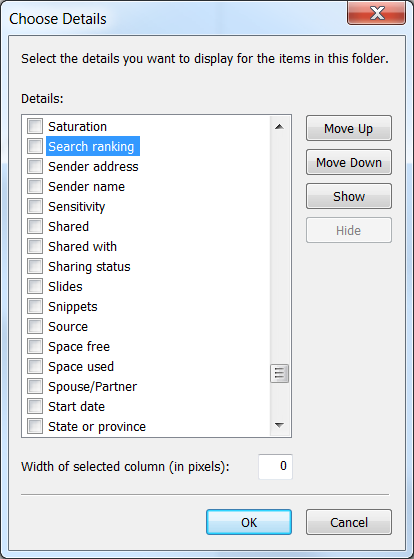 SE columns are not listed
Missing the Solid Edge properties in the list are an indicator that something went amiss with registering the properties during the Solid Edge ST9 installation. A quick fix is opening the DOS terminal (click Windows Start and type “cmd” in the search window) and typing the following:
cd “c:Program FilesSolid Edge ST9Program”
regsvr32 /s SEPropertyHandler.dll
Subsequently restart Windows Explorer (kill the ‘explorer.exe’ process in Task Manager (RMB on the Windows task bar) and also start it again via Task Manager) and you just mastered another obstacle!
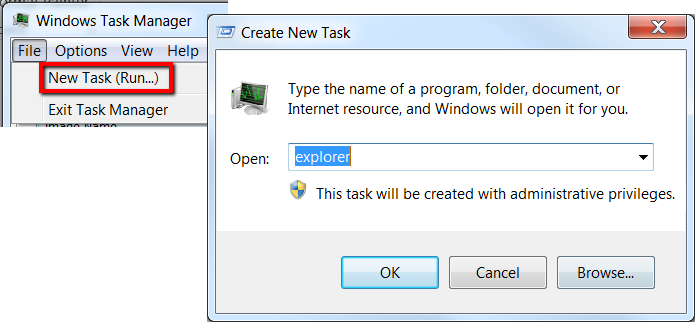 restarting Windows Explorer
Having squared away the fundamentals, we can now move on to the Solid Edge Options dialog and specify the location(s) of our CAD files by clicking on the ‘Set Locations …’ button.
 Fast Search settings in SE Options dialog
Windows ‘Indexing Options’ dialog will come up and after clicking the ‘Modify’ button one can check the desired locations.
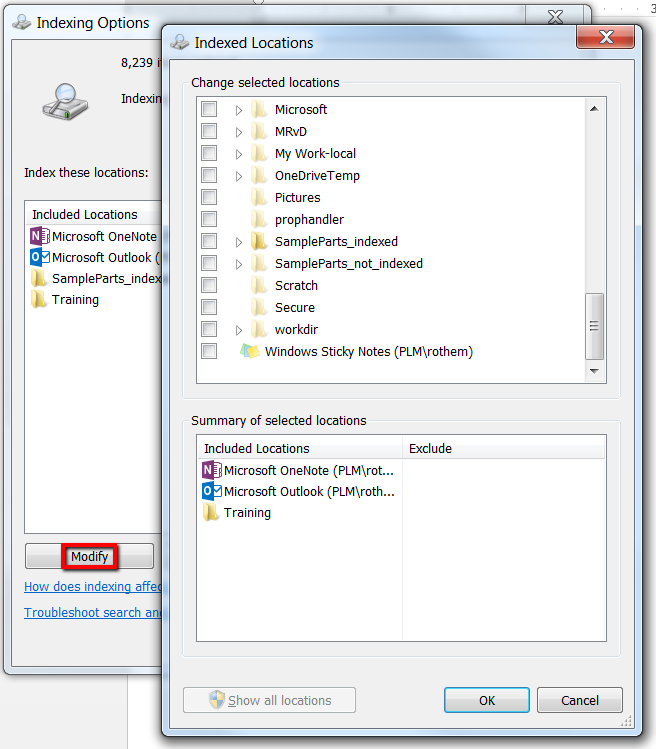 Modify indexed locations
Did you notice the different shading of the folder icon? Here is obstacle #3.
![]() folder icon shading
folder icon shading
Make sure the folder that carries your CAD files shows in bold colors. Windows indicates with the dimmed folder color, it is not allowed to index the file contents inside these folders. Therefore, if the folder you are selecting for indexing is shown in a dimmed color, close the ‘Indexing Options’ dialog and go to Windows Explorer to open the properties dialog of the folder and check the box in the ‘Advanced …’ options.
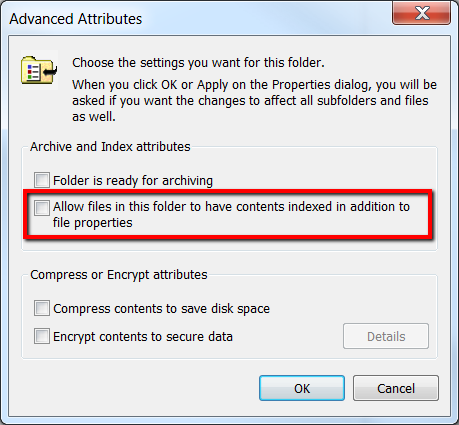 advanced folder options
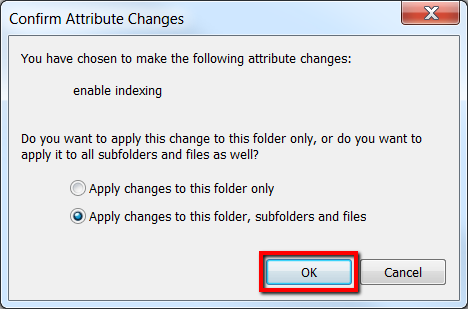
Make sure to click ‘OK’ on the following dialog:
 apply to all subfolders
Go back to the Solid Edges Options dialog and click the ‘Set Locations …’ button.
The folder icon shows now in bold colors and the Indexer can do its part.
Hope this helped …


Comments