Creating Animations in Solid Edge
I hope you have been following this pressure washer series, and that you are finding mating parts and creating motion as easy as I’ve found it. This series of articles started with the idea that I would just show readers how to create an animation. But I’m always looking for opportunities to reuse material, so “where do I get the assembly?” turned into “that assembly I used to show migration tools”, and then I filled in the blanks in between.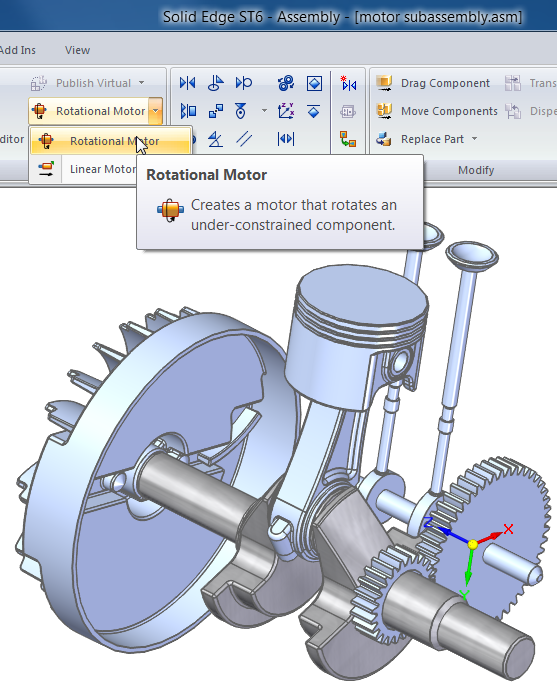
The motion of the motor is really ideal, even if it is a bit cliché. We will reuse the motor assembly with all of the mates, but make a special version of it for animation and for sharing (zipped assembly and parts are attached to this article).
Here’s how to get started. First, determine which kind of motor you need: rotational or linear. In this case we need rotational. On the Home tab in the assembly, in the Assemble group, click on Rotational Motor. You’ll get the CommandBar to the left. Follow the PromptBar prompts by selecting first a part to move (crank) and then an axis to spin around (one of the cylindrical faces of the crank). Now assign a speed. In order to actually see what’s going on, you can’t 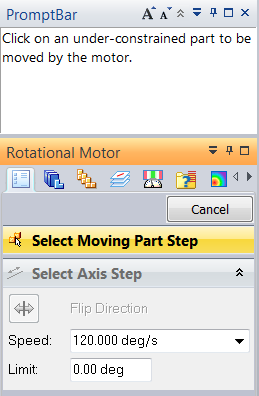 assign a realistic engine RPM, so assign something between 120 and 360 degrees per second. To some extent the option you choose here will affect the necessary quality of the final rendered animation. The more detail you want to see, the more fps (frames per second) you will need to save the final animation with. 20 fps is fairly common, high quality would be about 30 fps. Very high quality would go up to 60 fps. The higher the quality, the bigger the animation file size.
If all you want to do is make an assembly move with a linear or rotational motor, then you’re almost done. Click on Simulate Motor, right below the Rotational Motor icon.This brings up the animation interface shown below. Here you can change the properties of your motor, change the properties of the animation, view and save the animation.
If you want to do more, such as move the camera, change colors and fade parts, explode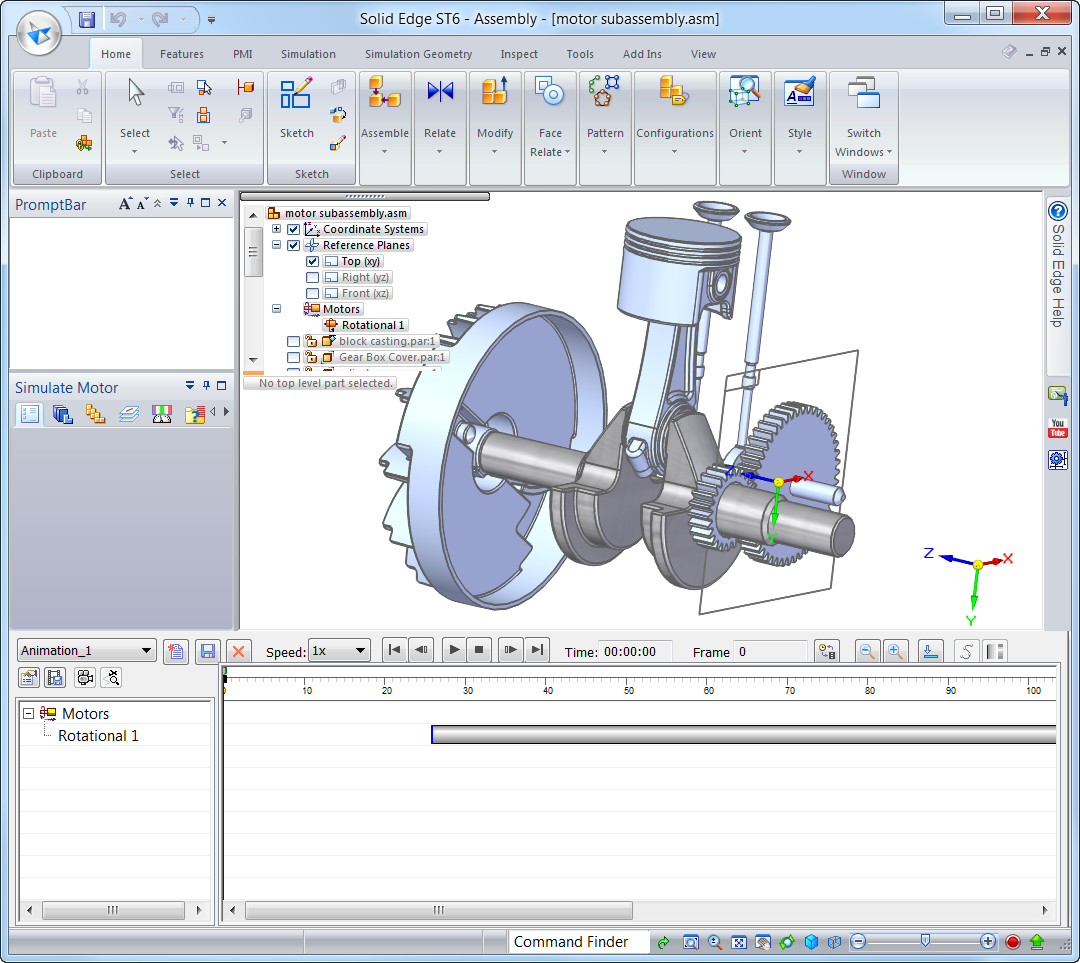 assemblies, use part and camera paths, you need to go to the ERA. Not earned run average. Not equal rights amendment. Explode, Render, and Animate. This is on the Tools tab of the assembly, in the Environs group. Once there, click on the Animation Editor in the Animate group, and the screen will look like this:
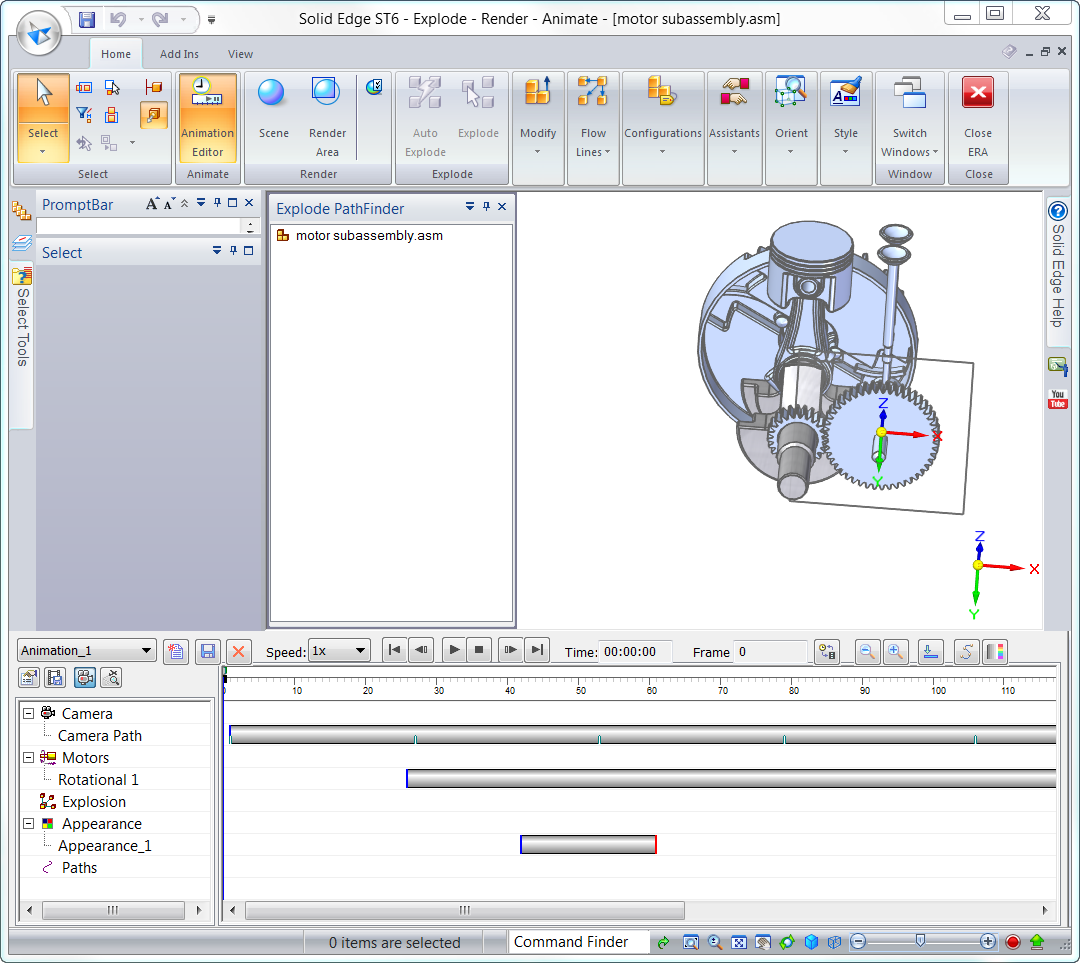
A little bit of experimentation in this area will help out a lot. The four icons over the left hand panel are:
- Animation Properties: allows you to set the length, name and frames per second rate of the movie
- Save Movie: allows you to save the animation as an AVI, and set several properties such as rendering quality, compression, pixel size, and so on.
- Camera Path: allows you to establish a path for the camera to follow
- Show Camera Path: toggles visibility of the camera path
Notice that the motion created by the motor appears as a bar in the timeline. You can move this bar, and drag the ends to lengthen or shorten the time for the motion. You can also have multiple motors creating motion, and they can start and finish at different times.
The Appearance entries also enable you to change display properties of parts during the movie, and specify when and how fast those changes happen. To be honest, I wasn’t able to get the part appearance changes to work, even though they do show up on the timeline. The appearance changes seem to show up in the rendered final animation, not in the preview you see in the graphics window.
My final rendering is below, and I have attached the initial assembly without any animation items added, as well as the final assembly with all of the animation items saved into it. Please play around with this animation stuff with some of your assemblies. I’d love to see some more examples of your assemblies in motion!


Comments